Start guide
›
js library
›
How to place tag snippets using Google Tag Manager (GTM)
By placing customized tags even when coordinating with GTM, you can measure item conversion.
This section explains how to send favorites list information from sites that use CODE Marketing cloud to GTM and how to send applicable data from GTM to CODE Marketing cloud.
1. Send measured data to GTM
1-1. Determine the page you want to measure and the information to measure
Make sure the page where you want to place customized tags is only a page where you want to measure various information.
1-2. Send measured information from the applicable page to GTM
In the page determined in 1-1, insert the following type of tag snippets in the location where you want to measure data.
<script>
window.dataLayer = window.dataLayer || [];
window.dataLayer.push({
 'event': "track:itemConversionEvent",
 'code-mc.itemConversionEvents': [
   {
     "itemId": "00001",
     "conversionType": "Entry",
     "itemCount": 1,
     "itemPrice": 1050,
     "sku": "SKU1"
   },
   {
     "itemId": "00002",
     "conversionType": "Entry",
     "itemCount": 1,
     "itemPrice": 1050,
     "sku": "SKU1"
   },
 ]
});	});
});
</script>
- The
event variable is used for recognizing custom events in GTM, so it is not possible to change the variable name event.
- The
code-mc.itemConversionEvents are variables used when sending data from GTM to CODE Marketing cloud. Because the values set in each variable for the above tag snippets are samples, so they should be changed as appropriate. Also, make sure to place tags in locations where each value can be accurately referred to so that CODE Marketing cloud can operate correctly.
※ Note that dataLayer is an object available in GTM and is used to hand over information to GTM. For dataLayer details, see the following webpage.。
The data layer - Tag Manager Help
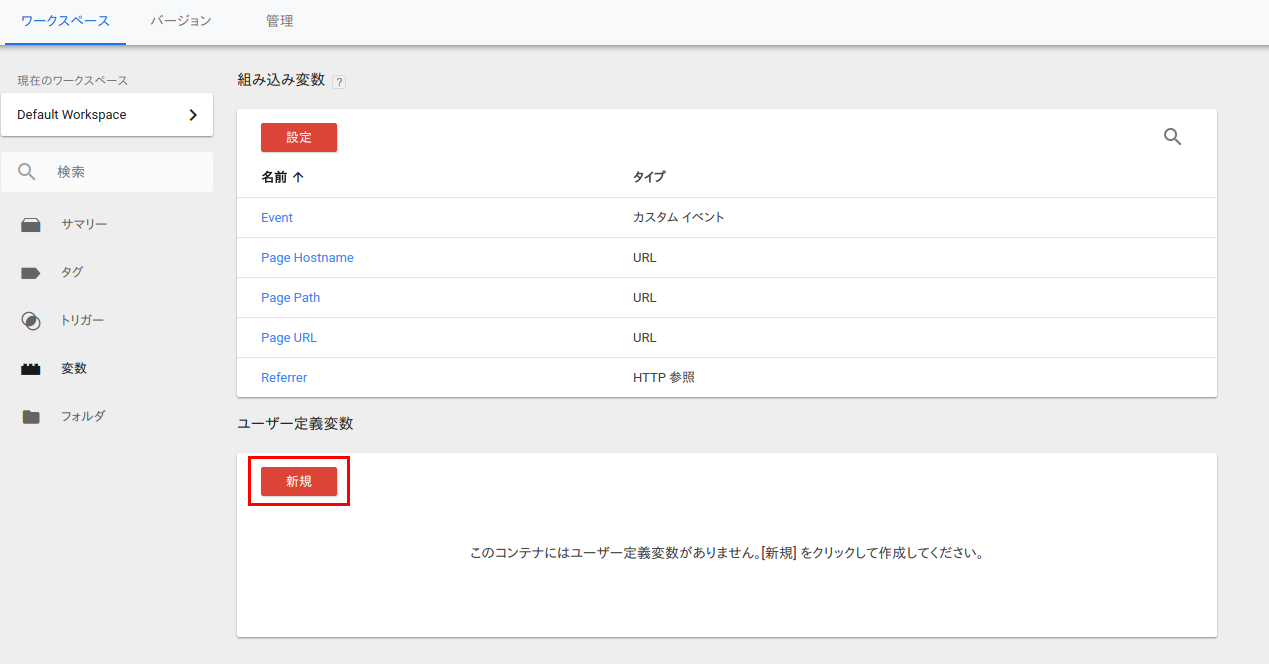
2. Send applicable data from GTM to CODE Marketing cloud
2-1. Register the dataLayer variable to GTM
Register the variable set in “1-2. Send measured information from the applicable page to GTM” to GTM.
2-1-2. For the variable type, select “Page variables” > “Data layer variables”
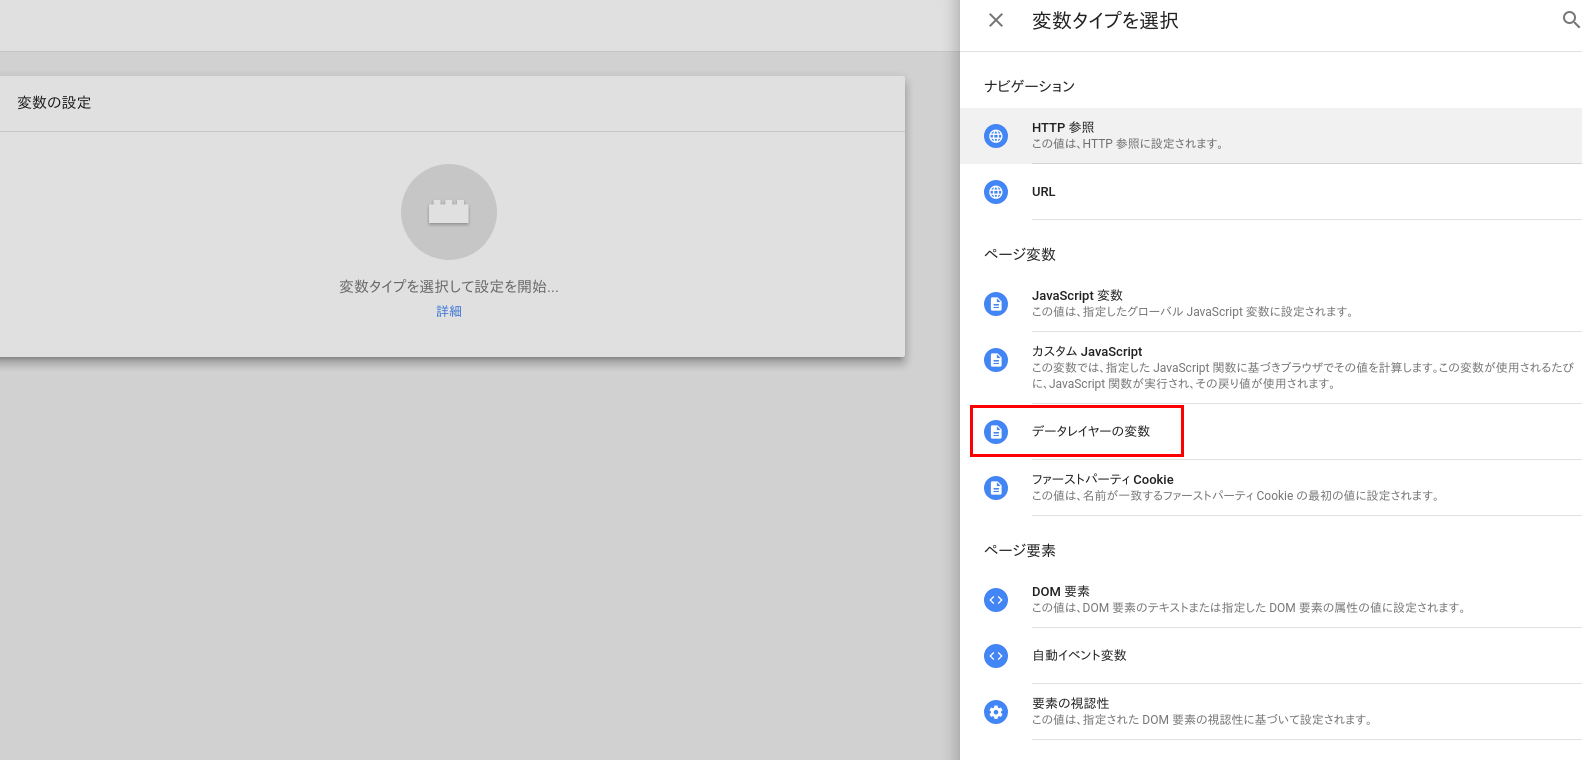
code-mc.itemConversionEvents
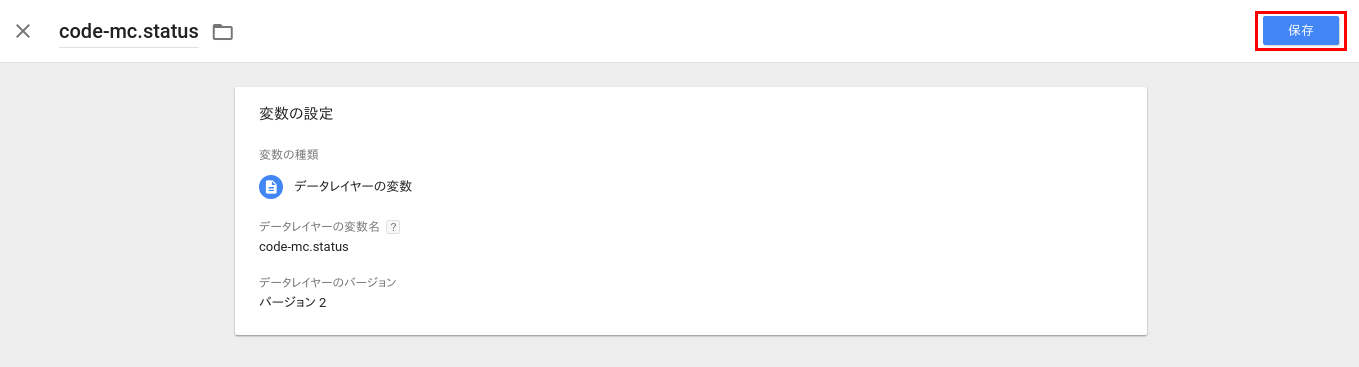
2-1-4. Click Save
2-2. Create a trigger
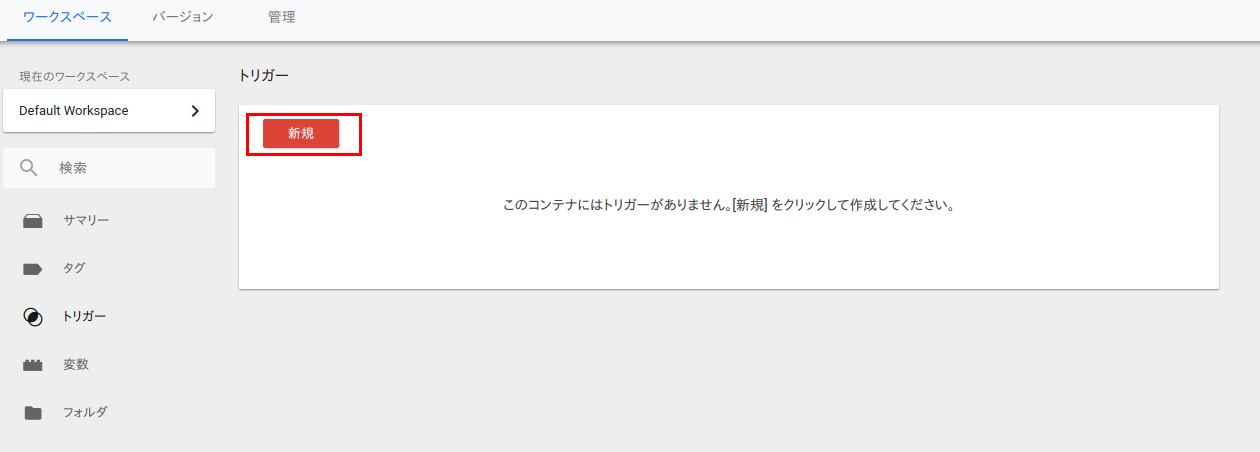
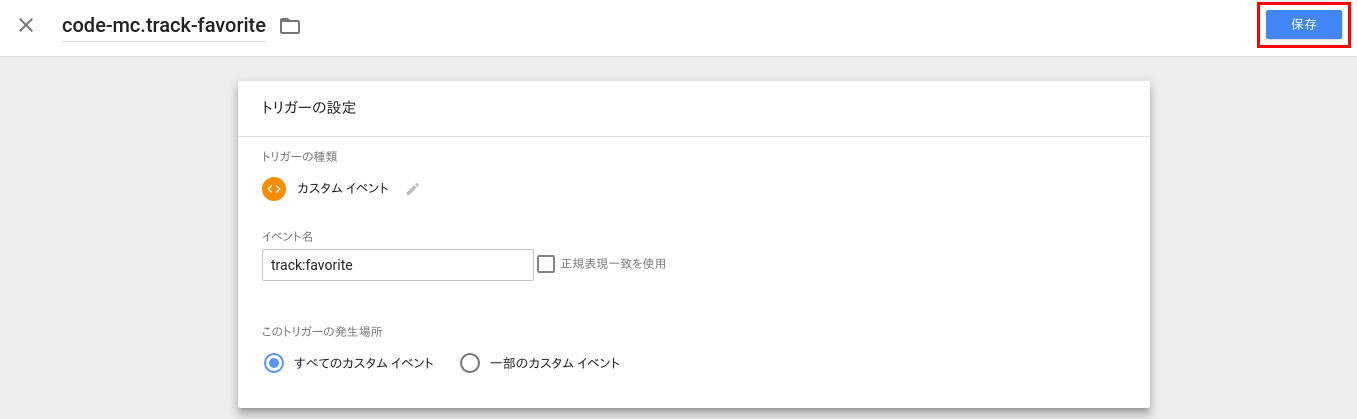
2-2-2. In trigger type “Other”, select “Custom event”

2-2-3. In the trigger occurrence location, select “All custom events”
2-2-4. In the trigger event name, enter the value set in the event variable in “1-2. Send measured information from the applicable page to GTM”](#1-2-send-measured-information-from-the-applicable-page-to-gtm)
When entered exactly as indicated in the samples on this page, enter track:itemConversionEvent
2-2-5. Click “Save”
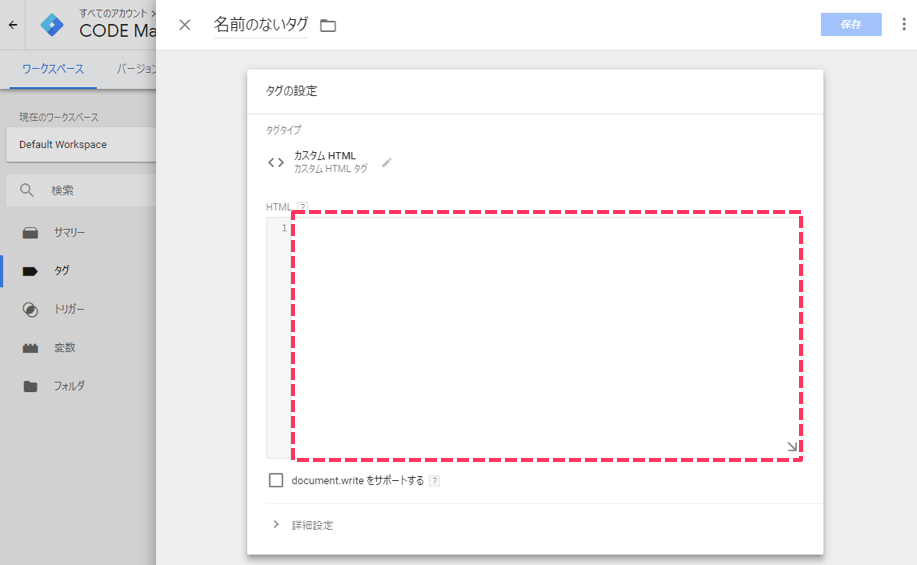
2-3-1. In “Select tag type”, select “Custom HTML tag”
Refer to the following samples and help pages of each customized tag for information you want to measurewhen writing.
{{code-mc.itemConversionEvents}} handle the variable names set in2-1-3.Take note that the description must contain {{}}
<script>
(function(){
  var data = {status : {{code-mc.status}}};
  if({{code-mc.itemConversionEvents}}) {
    _cc('track', 'itemCv', {{code-mc.itemConversionEvents}});
  }
})()
</script>
2-3-3. In “Distribution timing”, specify the trigger created in “2-2. Create a trigger”
2-3-4. Click “Save”
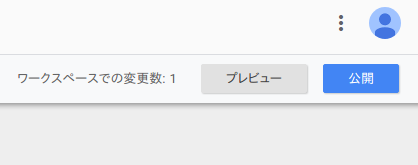
2-4. “Publish” changes
Publishing applies changes to your website for the first time.
Reference: Customized tags (item conversion measurement)